This guide takes you from zero to your first live query: get the beta package, install it on a search head, assign the roles, register an AWS account, and run | awsget. A typical setup takes under 10 minutes once you have the package.
Requirements
In brief: Splunk Enterprise 9.4, 10.0, 10.2, or 10.4 on a search head (or Splunk Cloud), outbound HTTPS from that search head to the AWS APIs, and a read-only IAM identity per account. The full compatibility matrix is in Requirements; the IAM policy to attach is in Accounts.
Get the app
Search for AWS is in beta and is not on Splunkbase yet. To try it, contact sales@outcoldsolutions.com: we send the app package and a license key for the beta, and support you through it. Install the package on your search heads only:
- Splunk Enterprise: Apps - Manage Apps - Install app from file, or unpack it into
$SPLUNK_HOME/etc/apps/. - Splunk Cloud: the same page installs it as a private app. Splunk Cloud runs AppInspect on a private app when you upload it, and the package is built and tested against that check set. See Splunk Cloud.
- Search head cluster: push it through the deployer, the same way you deploy any app. Running inside a search head cluster requires a license that allows it - see Licensing.
The app installs two custom roles and nine search commands. No restart of your indexing tier is needed.
Assign roles
Search for AWS separates the people who configure accounts from the people who query them. Two roles ship with the app:
aws_search_user- run the| aws*commands and manage your own per-user credentials. Grant this to anyone who should query AWS.aws_search_admin- everything a user can do, plus register, edit, and delete accounts, and change the app’s settings and license. Grant this to whoever owns the AWS connections.
A full Splunk administrator (the built-in admin_all_objects capability) can do everything without being assigned either role. Assign roles under Settings - Roles. The capabilities behind them are covered in Access control.
Register your first account
Open the app. Until an account exists, Splunk sends you to the Setup page (also reachable from the app’s navigation bar, or from Manage Apps - Search for AWS - Set up). On the Accounts tab, add an account with a name, the 12-digit account id, a default region, and a credential:
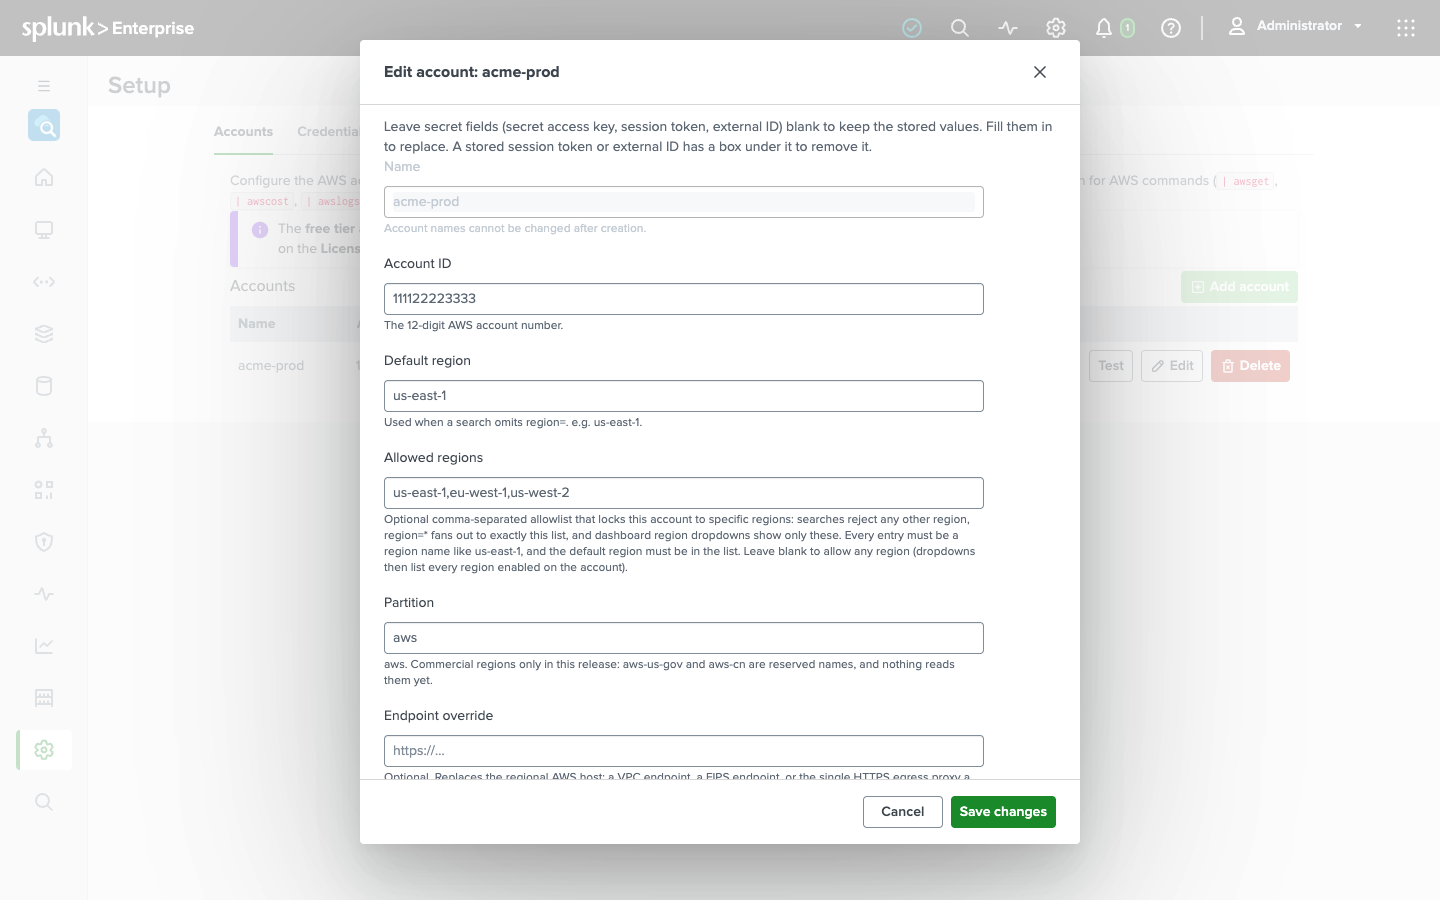
The name is what you type in account=, so pick something you will recognize in a search - prod, payments-prod, sandbox. Paste an access key id and secret access key (the secret is stored encrypted and never displayed again), save, and press Test: the app calls sts:GetCallerIdentity with the stored credential and shows the principal it resolved to, so a mistyped key is caught before your first search. Every credential type, the IAM policy to attach, and the optional region lock are in Accounts.
On the free tier you can register one account, with static keys or the instance role. Registering a second, or choosing cross-account assume-role, requires a paid license. The first account you add keeps working regardless.
Saving the first account also clears Splunk’s setup gate, so the dashboards open from then on.
Run your first search
Open Search in the app and list the EC2 instances in a region:
| awsget kind=instances region=us-east-1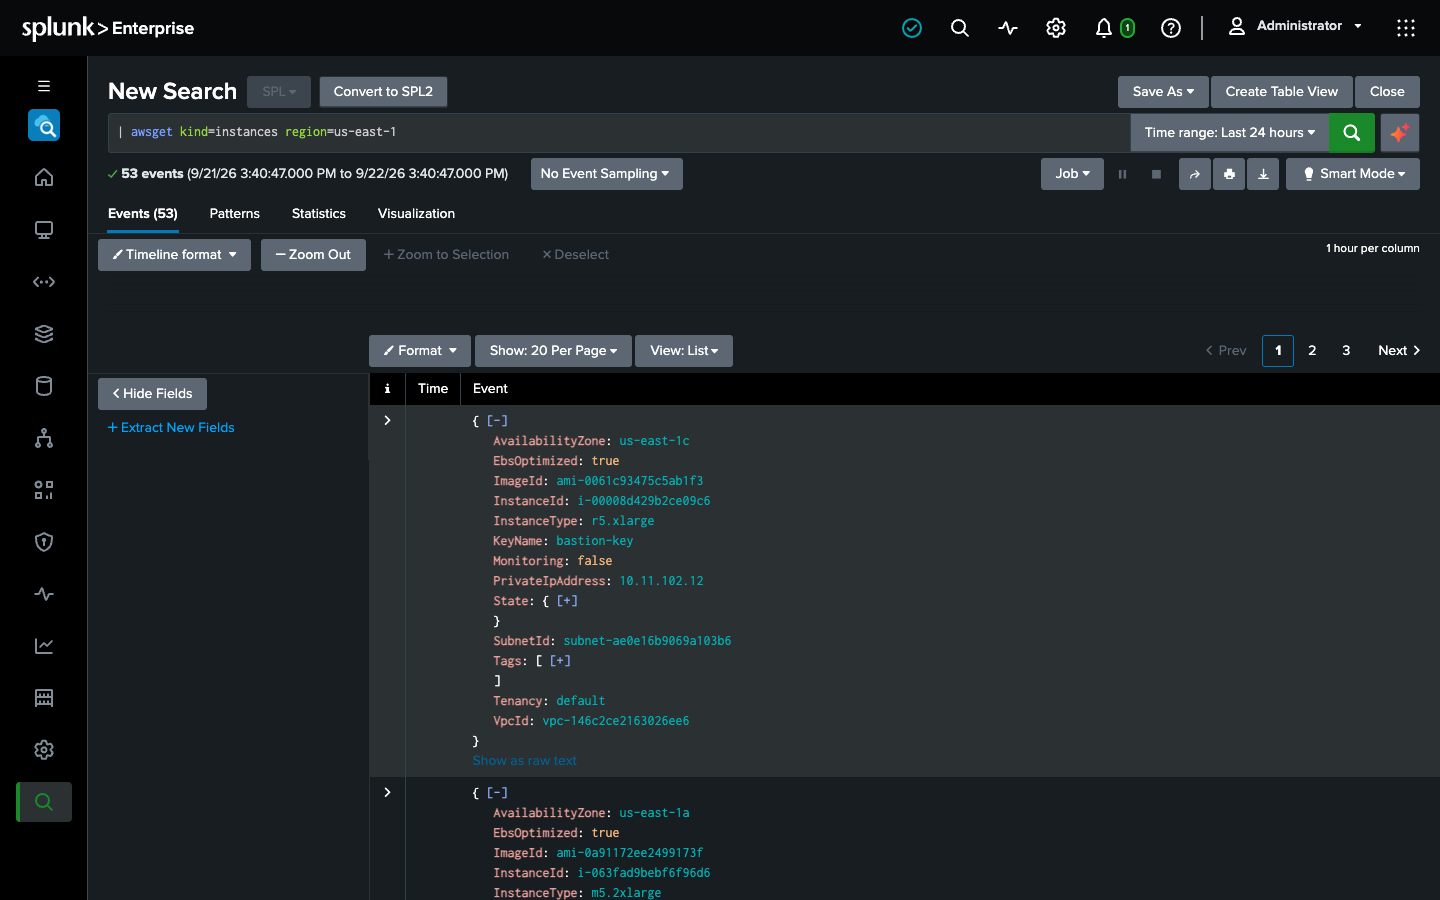
Each row is one AWS resource: _raw holds the resource’s properties as JSON, with the identifier and the top-level properties pulled out as fields, and account and region naming where it came from. Nothing was written to an index - the command called the Cloud Control API live and streamed the result into your search. From here you can pipe into any SPL you already know:
| awsget kind=instances region=us-east-1
| spath path=State.Name output=state
| stats count by InstanceType state
Try the other commands - look up who launched instances today, tail a Lambda function’s log, chart a CloudWatch metric:
| awscloudtrail attribute=EventName value=RunInstances start=-24h region=us-east-1
| awslogs groups=/aws/lambda/payments-api filter="ERROR" start=-1h region=us-east-1
| awsmetrics namespace=AWS/Lambda metric=Errors dimensions=FunctionName=payments-api stat=Sum period=300 start=-3h region=us-east-1
If you registered more than one account, add account= to pick one or account=* to fan out across all of them in parallel:
| awsget kind=buckets account=*
| stats count by account
The full syntax for every command is in the Command reference.
Open the dashboards
The app ships one dashboard per AWS service, grouped in the navigation bar the way the AWS console groups them - Compute, Networking, Storage, Databases, App Integration, Analytics, Security, Observability, and Management. Start with Overview: pick an account and a region, and its Navigator tab links to every dashboard. See Dashboards.
Free tier and licensing
Search for AWS runs with no license key on the free tier: one account, with static keys or the instance role, on a single standalone search head. A paid license unlocks multiple accounts, search head clustering, per-user credentials, and cross-account assume-role. See Licensing for the full breakdown and how to enter a key.
Search head clustering
In a search head cluster, deploy the app through the deployer. The app’s configuration - registered accounts, credentials, settings, and the license - replicates across members automatically, so an account you register on one member is usable by a search that lands on any other. The on-disk response cache is per member and is deliberately not replicated. Running in an SHC requires a paid license.